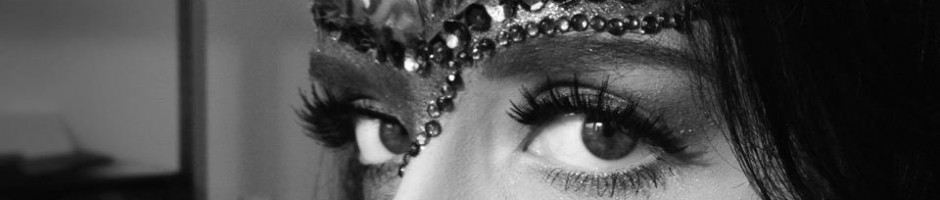
Faun Photo Shoot
As part of my portfolio building I am aiming to produce some images that demonstrate my strengths with different materials used in the special effects world. For this piece I chose to use liquid latex as my medium to make some prosthetic ears and horns. Because some detail is lost using this method I had to experiment prior to the shoot with different sculpts, adding exaggerated detail so that the detail I required once the liquid latex layers were added were to the quality that I desired.
Further to this as I have a large amount of experience when it comes to wig application. i found it only necessary to use a wig for this shoot also demonstrating another skill.
Enjoy the pictures prior to the professional pics and the professional pictures I had edited to further the feel and energy I wanted to portray.


Casting Continued
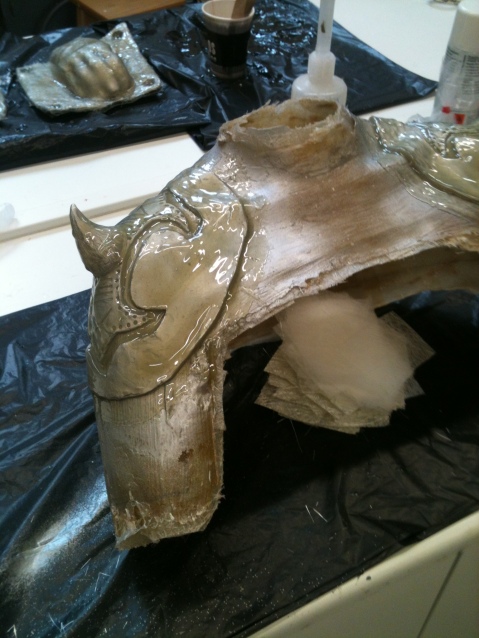
More on my cast, flashing complete, moisture sealant spray and mac wax releasing agent complete, gel coat complete, tomorrow more fibre glassing….. its never ending!
WENDY – A Short film

Last week I was very lucky to have the opportunity to work on WENDY – a short film. Post apocalyptic, comic book, super hero style, employed as lead special effects makeup artist for the duration of the filming. Each day was an experience in itself learning about the roles of each person on set and how many people and cast it took to make this film was incredible. Surrounded by passionate, dedicated media professionals and students I learnt how competitive the film industry was as each individual worked very hard in order to make the film happen.
A personal highlight of this film was that I had the opportunity to work with Chris Adamson, my first established actor I have worked on. More details of which can be found at http://www.imdb.com/name/nm0011478/
-

- Ombre brows, Waitress extra
-

- Collodion Scar
-

- Collodion scar and wound in the making

-

- Catering on set
-

- Club set
-

- In Makeup
-

- Hair
-

- UV Club scene
-

- With fellow makeup artists Becky and Hannah
-

- On set during sound check
-

- Our very own radio

-

- Crash matts for stunts!
-

- On set during rehearsal
-

- Greasepaints!
-

- Day 3, a very tired but still very excited Stella and Becky
-

- The crew watching the monitor during filming
-

- Makeup station
-

- Monitor preview
-

- Monitor preview
-

- Monitor preview
-

- Monitor preview
-

- Monitor preview
-

- Wendy (Amelia Clegg) getting ready for filming
-

- Dr Death (Chris Adamson) Close up on set

-

- No face, fantastic light up helmet
-

- Set spy
-

- Set spy
-

- Fresh wounds
-

- Fresh wounds
-

- On set editing
-

- Trevor on set with scar
-

- A cold Stella on set
-

- A tired producer on set
-

- Monitor preview of Wendy
-

- With Chris Adamson at the end of a long week of filming
-

- On set during filming
In the Workshop today…..
It became time to start the next stage in my mould making process, taking the cast I took from Catherine (2 Weeks ago) I was able to start preparations and the 2 layers for fibreglass. Working with these new materials meant I had to take more of a mental note when it came to the health and safety side which we all like to forget but still it is very important! So you’ll see a picture of me wearing the height of fashion in terms of workshop attire, goggles to protect my eyes from the fibreglass resin, catalyst and gel coat (anything splashed into my eyes could cause trouble!) A mask to protect from the lovely fumes created from the gel and fibreglass resin, gloves to protect my digits from the fibreglass matting itself as the tiny fibres have a nack for getting into your skin and becoming quite uncomfortable. An overall lastly to protect my clothes. Fibreglass is a tough one to get off off clothes and out of hair be warned!


Make a portfolio book!

This week I have been exploring different ways in which I can show off my work for portfolio and interview purposes. The most interesting, fun and unique of which I found that you can make your own book to display your images! The website link I have provided (click on the arrow) takes you to the Blurb website that allows you to download the software free where you can custom design your own book. Add your own images and text where you desire and once your book is complete you are then able to click the icon to order it! For around £25 you can get a standard portrait size hard back book and in comparison to printing costs and other portfolio display books, boxes, cases I think its a really fair price to pay for a fun way to show our work.
Today in the workshop……
With projects coming out of my ears it was time to get casting so that I have some casts to sculpt on, and yes that does mean many new prosthetics! Using the totally cost effective Mod roc (plaster bandage) and the gorgeous Catherine as my model I made a cast of her back and chest, which was in two parts. It was important to make sure there were at least two layers of the plaster bandage and so that it was strengthened with extra bandage across the chest, back and along the edges of the cast. Shellac and vaseline were used on the first half on the edge of the cast so that the second half would not stick the casts together (this would make it really difficult for removal!)
Looking forward to completing the cast tomorrow! Then I can start my favourite part…. the sculpting!!
-

- Catherine is loving her ‘spa’ day in the workshop

-

- The shellacked ridge
-

- Back piece meets up to the front


-

- One removed…..
-

- plaster is painted on to rid of air holes
-

- Cheeky head cast this morning!
London Harry Potter
So last week I visited the lovely London with my class friends, had a fantastic time staying in Central and seeing the Lion King at the Lyceum theatre! Part of our journey there meant we were able to visit the wonderful Harry Potter museum. Expectations were high and I was not let down….. real life set pieces, props and even the chance to ride your very own broom around Hogwarts (ok it was in a green room) but nothing could prepare me for the last room and with out giving too much away I had to take some photos of the beautifully made facial and body prosthetics that were used during the films, I also got the chance to see some of the animatronics which has sparked a new interest so keep posted as you may be seeing some experimentation occurring…..


Ear Casting
Last week I began my learning on how to make an ear cast. This was done by creating a negative of the ear with Alginate then once set your are able to fill the negative ear mould with plaster to form your ear cast.
The purpose of this exercise was so that I could learn different methods and areas of the body which can safely be cast as the final cast of the ear can be sculpted onto. From this a custom made prosthetic to whomever body part has been cast can be made. More regarding this will come in time as I will sure be doing some experimenting!
You’ll also find some very attractive photos of having my own ear being cast….. not sure I really enjoyed the experience, the alginate tickled my ear and can be quite a shock as its a cold and gloopy material but as always its always its good to get a feel for what any life cast models go through buy having the process done to you yourself.


Brow Blocking with Wax
This week I experimented with blocking the eye brows with the help from wax, in this case Ben Nye nose and scar wax. This method typically used for stage shows and theatre works by filling and smoothing down the brow hairs allows you to apply makeup over the top including a new brow if needed. For this task I simply just used the wax I already had present in my kit but you can purchase many products specifically designed for the use of blocking the brow out including Brow plastic/wax and sealant by Kryolan. The wax can be difficult to work with especially if you are trying to use Derma wax as this wax I found is too tacky and sticky, luckily the nose and scar wax worked perfectly for this task. Dependant on what the blocking of the brow is needed for it can work as a perfect cheap alternative to many other methods of blocking the brow blocking including the use of cap plastic and is more durable than the pritt stick method and water based spirit gum. Many Drag queens use this method for their performances where the method demonstrated below contends perfectly with the heat from the intense lighting. With this in mind I created my very own drag queen inspired makeup of the eye and brow area using the wax blocking method. 
Red Carpet Makeup


This gallery contains 4 photos.
My final design for the red carpet look, hollywood waves, red lipstick, glamorous swooping eyelashes with a touch of sparkle to shine on the red carpet.

